
How to fill the joints between crazy paving?
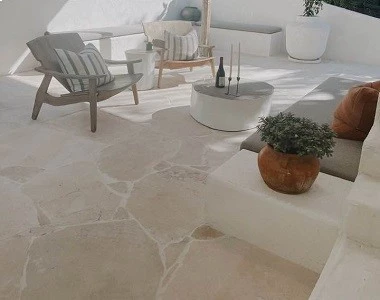
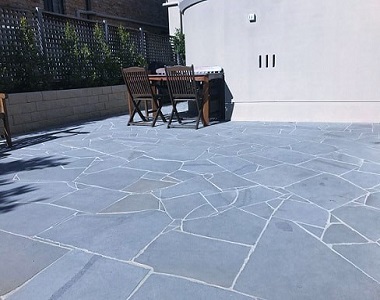
Crazy paving is a type of paving that uses natural stone slabs of irregular shapes and sizes. This gives it a unique, rustic look that is perfect for patios, walkways, and other outdoor spaces. However, the irregular shapes of the slabs can also make it challenging to fill the joints between them.
There are two main ways to fill the joints between crazy paving slabs: with mortar or with sand.
Filling the joints with mortar
To fill the joints with mortar, you will need to mix a batch of mortar according to the manufacturer’s instructions. Once the mortar is mixed, use a trowel to apply it to the joints, pressing it in firmly to ensure that there are no voids. Once all of the joints are filled, use a damp sponge to wipe away any excess mortar from the surface of the slabs.
Filling the joints with sand
To fill the joints with sand, simply sweep the sand into the joints and use a broom to brush it in. You can also use a watering can to dampen the sand, which will help it to settle into the joints. Once the sand is settled, use a broom to sweep away any excess sand from the surface of the slabs
Which method should you use?
Which method you choose to use will depend on your personal preference and the desired look of your paving. If you want a neat and tidy finish, then filling the joints with mortar is the best option. However, if you prefer a more rustic look, then filling the joints with sand is a good choice.
Here are some additional tips for filling the joints between crazy paving slabs:
- Make sure that the joints are clean and free of debris before you start filling them.
- If you are using mortar, be sure to mix it to the correct consistency. It should be thick enough to stay in the joints, but not so thick that it is difficult to work with.
- When filling the joints with mortar, be sure to press it in firmly to ensure that there are no voids.
- If you are filling the joints with sand, use a watering can to dampen the sand before sweeping it into the joints. This will help it to settle into the joints more easily.
- Once the joints are filled, use a broom to sweep away any excess mortar or sand from the surface of the slabs.
Once the joints are filled, you should allow the mortar or sand to cure for at least 24 hours before using the paving.
Additional Tips
Once the foundation is in place, you can start laying the paving slabs. It is important to use a variety of different-sized slabs to create a natural and irregular look. When laying the slabs, be sure to leave a gap of 10-20mm between each slab.
Once all of the slabs are laid, you can fill the joints between the slabs with sand &/mortar. Use a watering can to dampen the sand before sweeping it into the joints. This will help it to settle into the joints more easily.
Once the joints are filled, use a broom to sweep away any excess sand from the surface of the slabs. You can also use a compactor plate to compact the sand in the joints.
By following these tips, you can create a beautiful and durable crazy paving patio that will last for many years to come.
Need a hand?
Call: 03 9706 9767
Our friendly Crazy Paving Experts are here to help you get the best paving solution for your project!
We’re available: Mon – Fri 7.30am – 5pm & Sat 9am – 4pm.
After hours please contact us here.

